When automating business processes in Odoo, Automated Actions, Server Actions, and Scheduled Actions are key players. These tools function like superheroes, making sure your business operations are smooth, efficient, and seamless.
Introduction
In today’s digital era, efficiency is crucial. To stay competitive, businesses must operate smoothly with minimal manual intervention. Odoo, a comprehensive ERP solution, provides tools to automate routine tasks, streamline workflows, and boost productivity. Among these, Automated Actions, Server Actions, and Scheduled Actions form the ultimate automation trio. These features work quietly behind the scenes, handling tasks like sending alerts, executing scripts, and scheduling reports, so businesses can focus on growth and innovation.
1.Automated Actions
Automated Actions is one of Odoo's most practical tools. It acts like a superhero, taking action as soon as an event triggers in your workflow. For example:
A new customer record is created? BAM! An automatic welcome email is sent.
Has your stock level dropped? BANG! An alert is sent to the purchasing department.
We can compare it to autopilot mode; you can sit back and relax while things run on their own.
To view or create automated action go to:
Settings → Technical → Automation → Automated actions
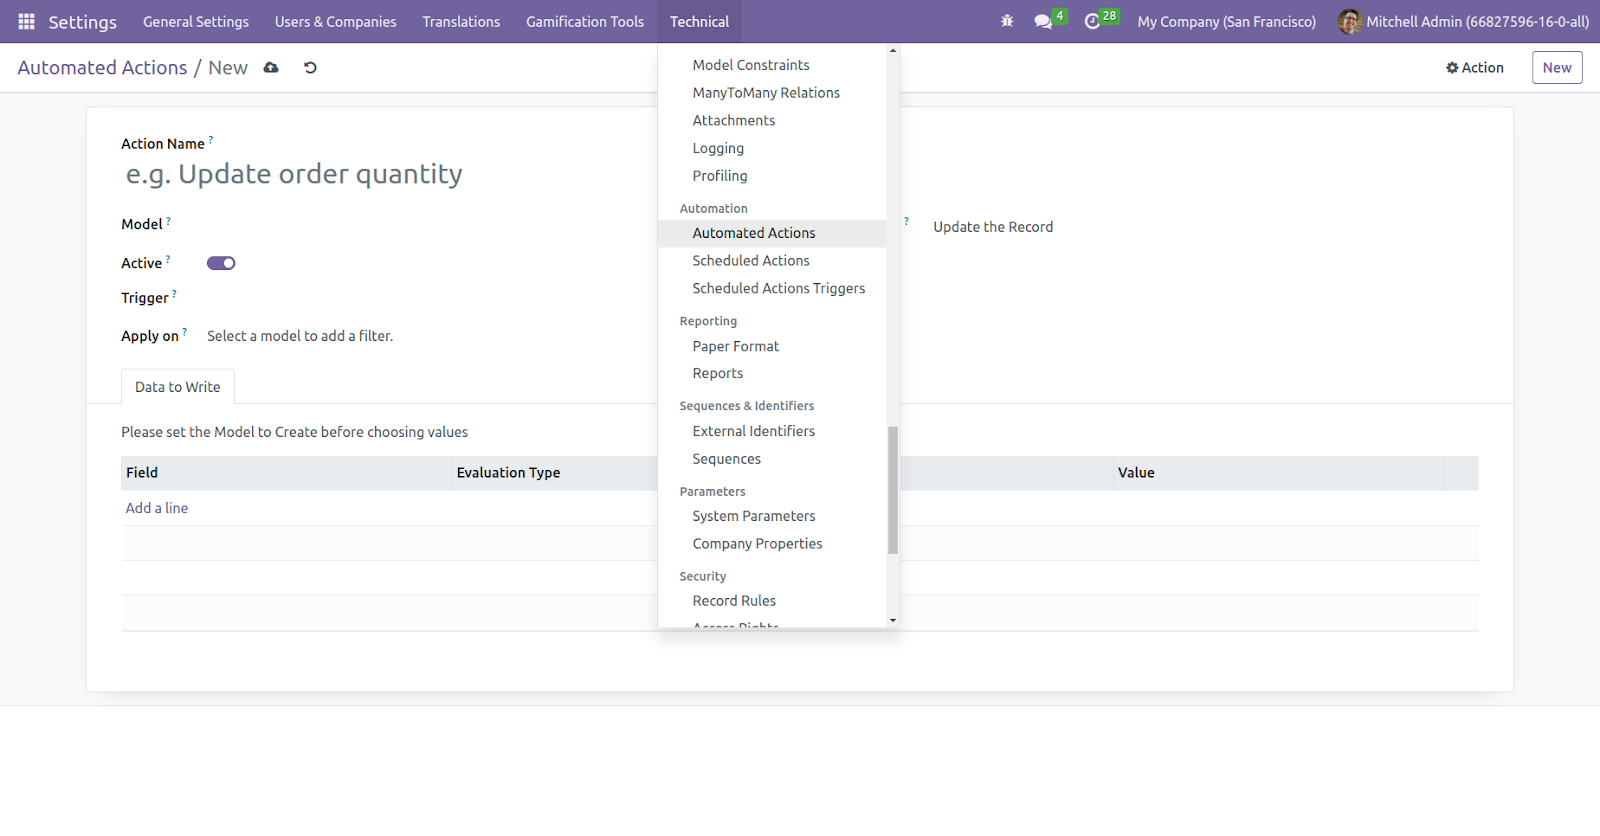
To create a new automated action, click on the CREATE button.

Model: Select the model where the automated action should be applied.
Trigger: Define when the automated action should be applied.
Six triggers are available.
On Creation
The action is triggered when a record is created and then saved.
On Update
The action is triggered when a previously saved record is edited and then saved.
Use Trigger Fields to specify which fields - and only those - trigger the action on their update.
To detect when a record changes from one state to another, define a Before Update Domain filter, which checks if the condition is satisfied before the record is updated. Then set an Apply on filter, which checks if the condition is met after the record is updated.
On Creation & Update
The action is triggered when a record is created and saved or edited afterward and saved.
On Deletion
The action is triggered when a record is deleted.
Based on Form Modification
The action is triggered when any change is done to a trigger field’s value on the Form view, even before saving the record. This trigger only works on the user interface when a modification is made by a user. If the field is changed through another action and not by the user, the action will not run.
Based on Timed Condition
The action is triggered when a trigger field’s date or date & time value is reached.
To trigger the action after the Trigger Date, add a number of minutes, hours, days, or months under Delay after trigger date. To trigger the action before, add a negative number instead.
Apply On: Define on which records of the model the automated action should be applied. It works the same way as when you apply filters on a model.
Action: Determine what the automated action should do (server action). There are eight types of action to choose from.
(Execute Python Code, Create a New Record, Update the Record, Execute Several Actions, Send Email, Add Followers, Create Next Activity, Send sms Text Message)
2.Scheduled Actions
Scheduled Actions allow you to automate tasks at predefined intervals. Whether you need to generate daily reports or perform routine checks, Scheduled Actions ensure that everything happens on time.
Example Use Case: Automatically generate a welcome email for the user at the time of registration
Steps to Create Scheduled Actions:
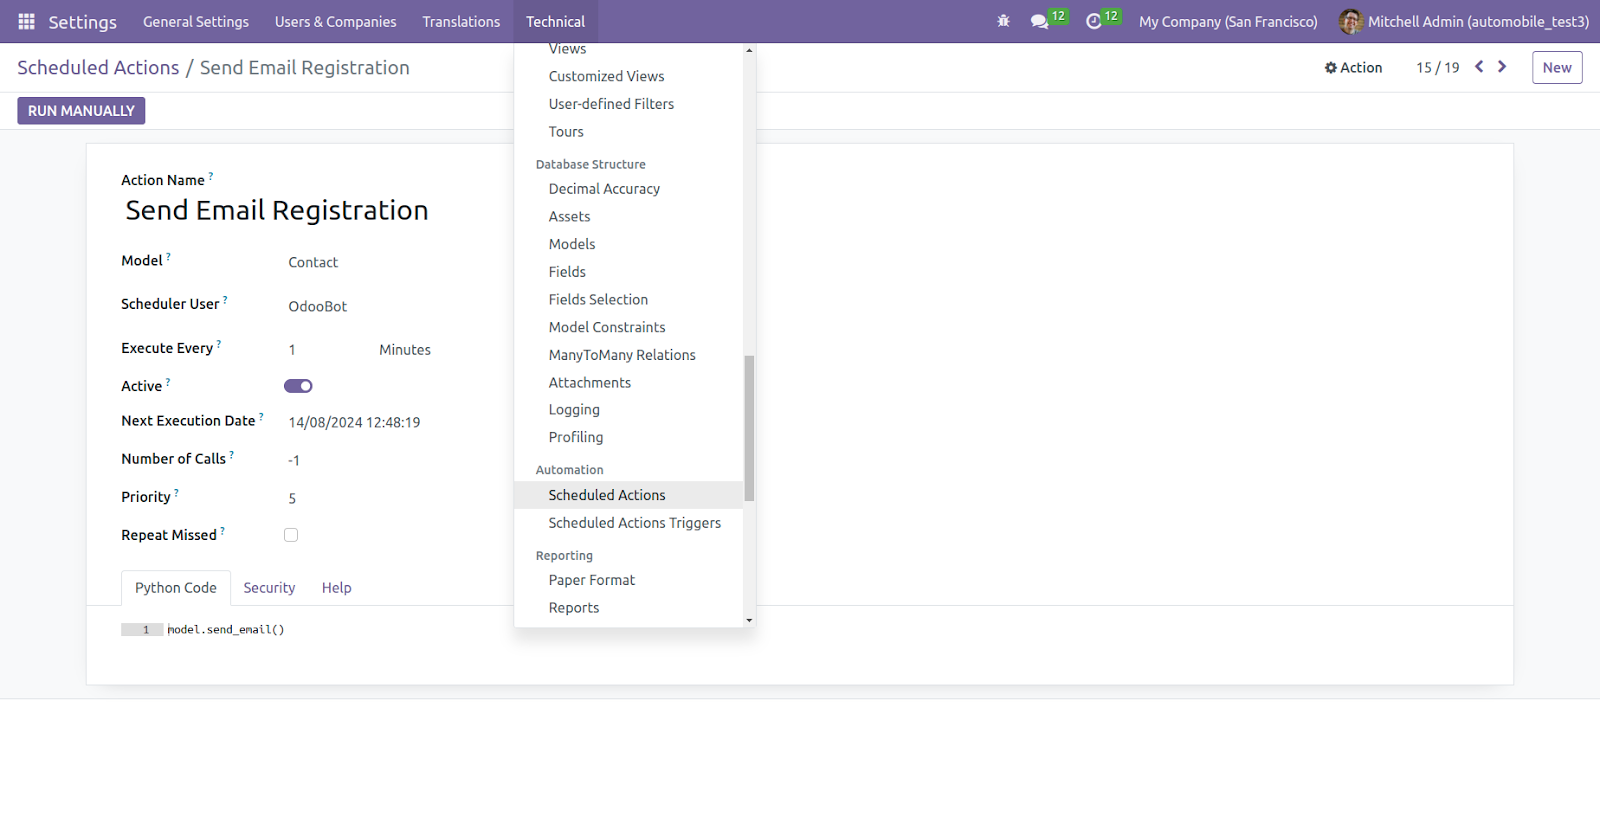
Navigate to Technical Settings: Go to Technical > Automation > Scheduled Actions.
Create a New Scheduled Action:
Click "Create."
Enter the name of the action (e.g., "Send Email Registration").
Choose the model (e.g., contact).
Set the interval (e.g., daily).
Configure Execution Timing: Set the next execution date and time.
Activate the Action: Ensure that the action is activated by ticking the "Active" checkbox.
Save and Monitor: Save the action and monitor its execution in the logs.
3.Server Actions
Server Actions provide the flexibility to execute more complex operations, such as running custom code when certain conditions are met. They are ideal for advanced automation needs.
Server action in Odoo can be accessed or created from the user interface by activating the ‘Developer Mode’ and then going through the below steps –
Settings → Technical → Actions → Server Actions
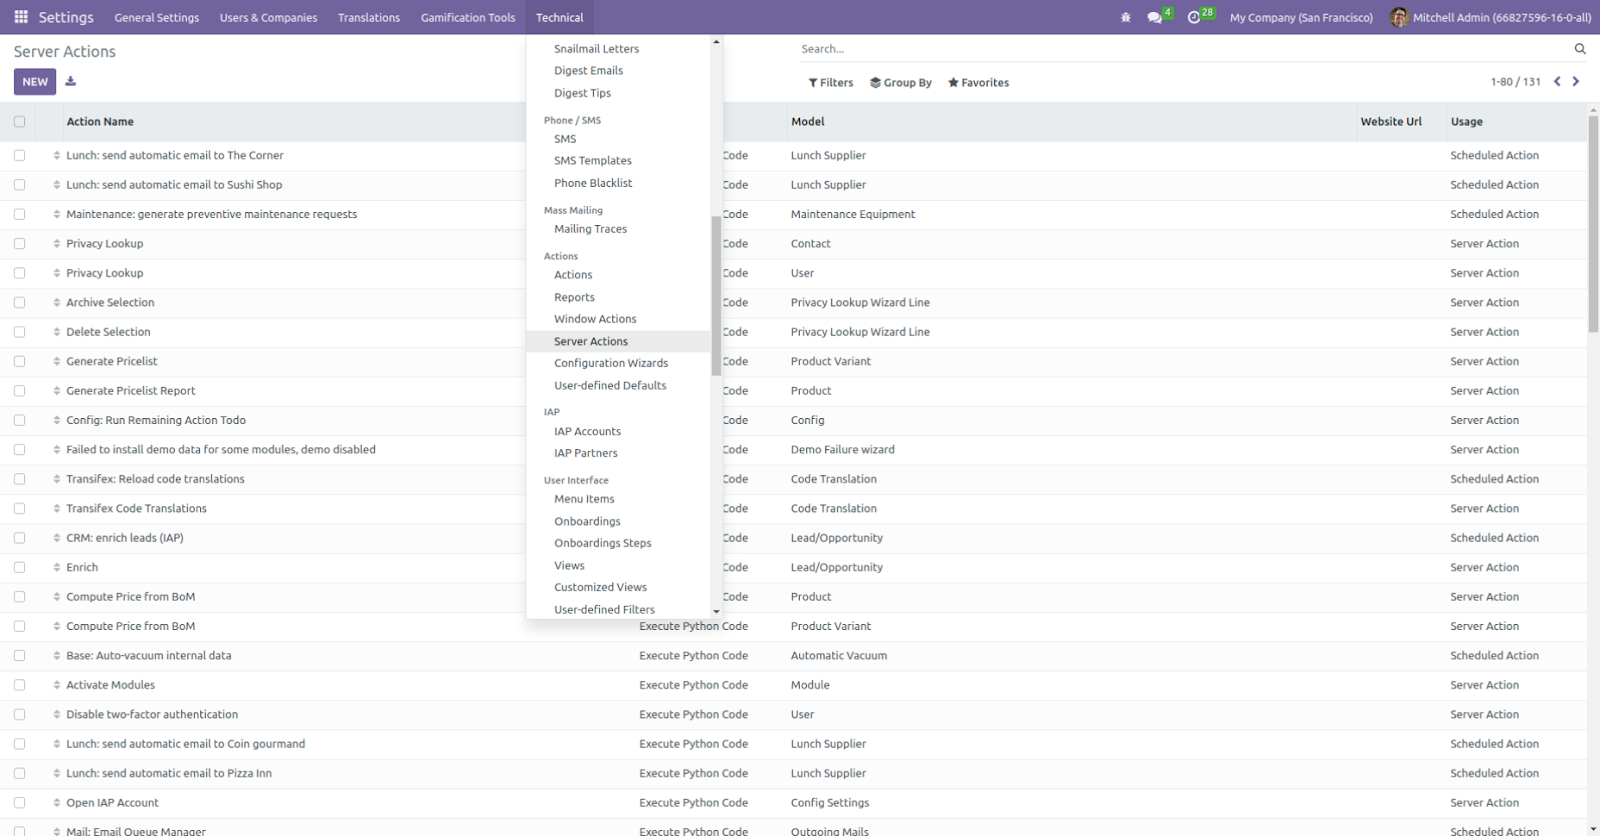
‘Server Actions’ work on a base model and offer different actions that can be executed.
Different actions that a server action can perform include :
Execute the Python Code
Create a Record
Update the Record
Execute several Actions
Send Email
Add Followers
Create Next Activity
Send an SMS Text Message
Execute Python Code
The "Execute Python Code" action allows you to run custom Python scripts directly within Odoo. This is one of the most powerful server actions because it gives you the flexibility to implement custom logic that may not be achievable with other predefined actions.
How It Works:
You write a Python script that operates on the selected records. This script can modify records, create new ones, interact with other models, or even make external API calls.
The code is executed in the context of the selected records, and you have access to all Odoo models and fields within the script.
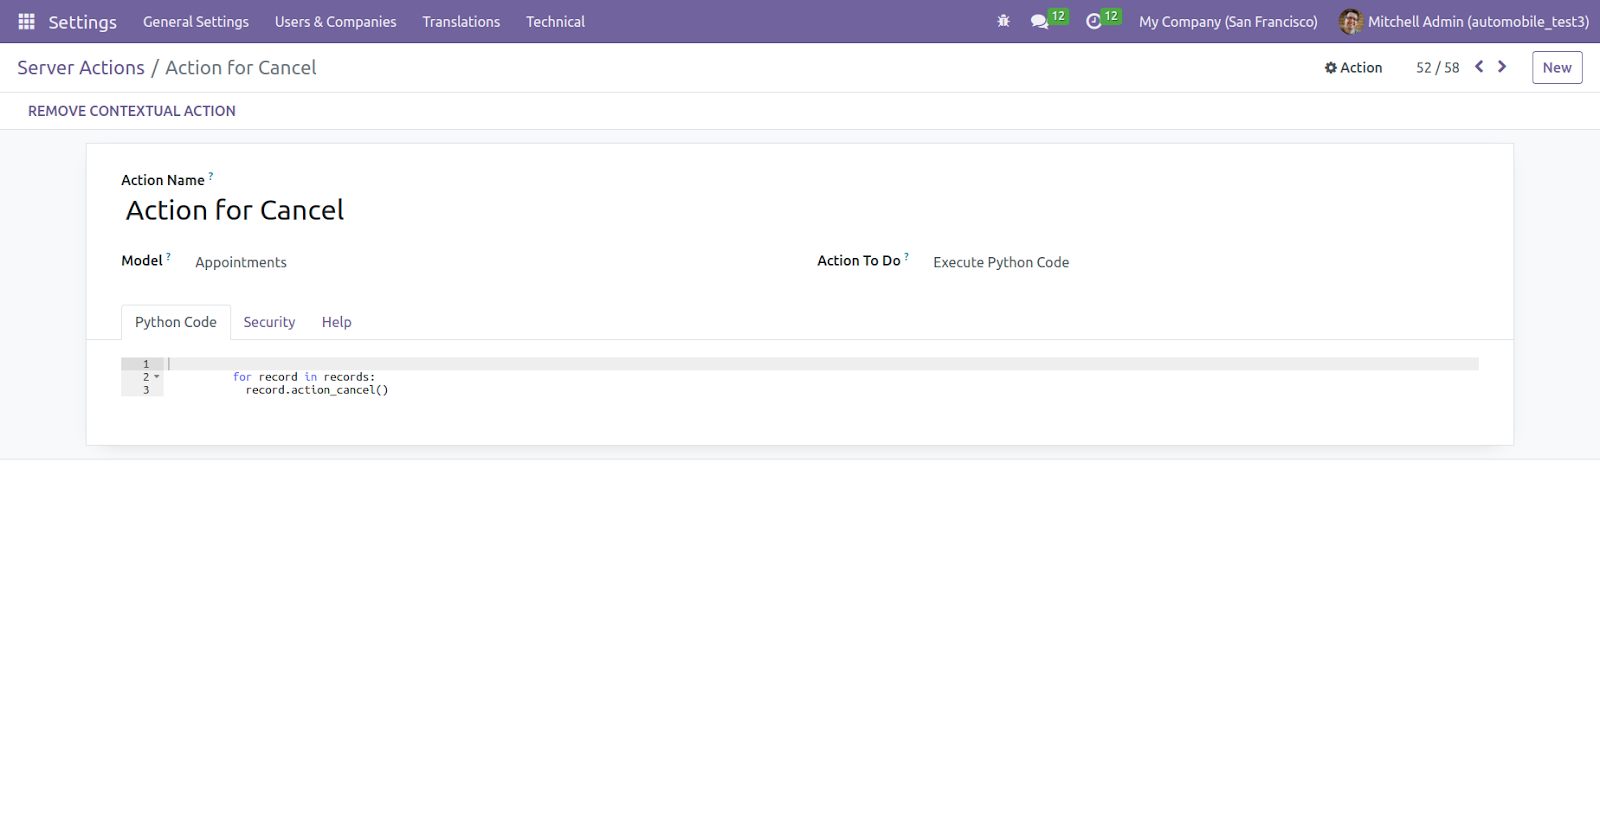
Example Use Case: When selecting one or multiple appointments, tapping on 'Action for Cancel' changes the state of the selected appointments to 'Cancel.'
Steps to Create Server Actions:
Access Server Actions: Go to Technical > Actions > Server Actions.
Create a New Server Action:
Click "Create."
Name your action (e.g., "Action for Cancel").
Choose the model (e.g., Appointments).
Define the action (e.g., "Execute the python Code").
Write the Python code that will be executed.
3.Test the Action: Save your server action and test selects the record and tap on the action
4.Review Logs: Check the logs to ensure the action executed correctly.