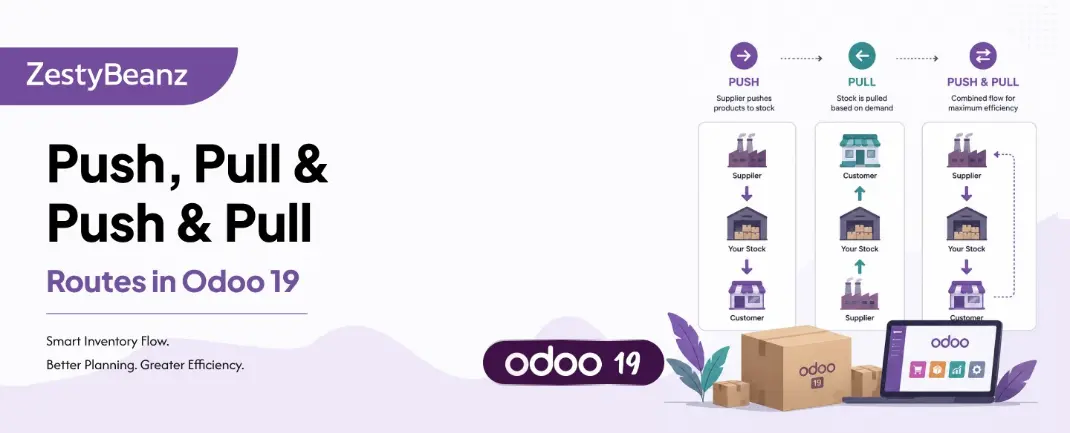
Push, Pull & Push & Pull Understanding Route Rules in Odoo 19 Inventory
Routes in Odoo 19 are made up of Rules. Each rule tells the system when to create a stock transfer, where to move goods from, and where to move them to. The action type of a rule — Push, Pull, or Push & Pull — determines what triggers that transfer. Getting this right is the key to building an automated, intelligent supply chain inside Odoo.
This blog explains how each rule type works, when to use each one, and how they combine to create powerful routing logic across your warehouse.
Routes and Rules: The Basics
In Odoo 19, a Route is a named collection of Rules. You assign routes to products, product categories, warehouses, or individual order lines. When an operation is triggered, Odoo evaluates the relevant routes and executes the rules in sequence to orchestrate the movement of goods.
📍 WHERE TO FIND THEM | Navigate to Inventory → Configuration → Routes to view all routes. Click any route to inspect its rules. To see rules directly, go to Inventory → Configuration → Rules (you may need to enable developer mode). |
Anatomy of a Rule
Every route rule in Odoo 19 contains the following fields:
Rule Field | What It Controls |
|---|---|
Action | Push, Pull, or Push & Pull — the trigger logic |
Source Location | Where the product is moving from |
Destination Location | Where the product should move to |
Operation Type | The type of transfer created (Receipt, Internal, Delivery) |
Route | The parent route this rule belongs to |
Warehouse | Scope the rule to a specific warehouse |
Auto-trigger | Whether the transfer is created automatically or needs manual action |
Rules execute in sequence — a route can chain multiple rules together so that a single sale order triggers a cascade of transfers automatically from supplier all the way to the customer.
Push Rules
A Push rule is triggered by the arrival of goods at the source location. When products land at the defined source, Odoo automatically creates the next transfer to move them to the destination. You don't need a demand signal — the mere presence of goods at the location is enough to trigger the next move.
PUSH | Trigger = Goods arrive at the source location. Odoo immediately creates a transfer to push them forward to the next location in the chain. |
How Push Rules Work — Step by Step
1. Goods are received or moved into the Push rule's source location
2. Odoo detects the arrival and evaluates matching push rules for that location
3. A new transfer is created automatically (or queued for manual processing, depending on the auto-trigger setting)
4. The transfer moves goods from the source to the destination location defined in the rule
5. If another push rule exists on the destination, the chain continues
Push Rule: Auto-Trigger vs Manual
Each push rule has an Auto-trigger setting. When enabled, the transfer is created and can even be auto-validated without any user action. When disabled, the transfer is created but waits for a warehouse operative to process it manually. This gives you the flexibility to automate routine moves while keeping manual oversight on others.
💡 EXAMPLE | A 2-step receiving route uses a push rule: when goods arrive at WH/Input (auto-triggered), Odoo creates an internal transfer to WH/Stock. The operative validates the receipt, and the put-away transfer is already waiting in the system. |
Common Push Rule Use Cases
Moving goods from an Input staging area to main stock after receipt
Transferring finished goods from a production floor to a finished goods location
Automatically routing goods through a quality control zone before stock
Crossdocking: pushing goods received from a supplier directly to an outgoing area
Internal replenishment between sub-locations within the same warehouse
⚠️ CAUTION | Push rules do not consider demand. They will always move goods forward regardless of whether there is a customer order waiting. For demand-driven movement, use Pull rules instead. |
Pull Rules
A Pull rule works in the opposite direction to Push. Instead of being triggered by the arrival of goods, it is triggered by downstream demand — a confirmed Sale Order, a Manufacturing Order needing components, or another rule in the chain. Odoo works backwards from the demand, creating the necessary transfers to fulfil it.
PULL | Trigger = Demand from a Sale Order, Manufacturing Order, or another pull rule. Odoo traces back through the route and creates the required transfers to satisfy the demand. |
How Pull Rules Work — Step by Step
1. A Sale Order is confirmed, creating a delivery demand at the output location
2. Odoo evaluates the product's route and finds the relevant pull rule
3. The pull rule creates a transfer from the stock location to the output location
4. If the stock is insufficient and a procurement rule exists, Odoo traces back further
5. A Purchase Order or Manufacturing Order is created to source the goods
6. The entire chain — procurement → receipt → delivery — is linked to the original demand
Pull Rule Trigger Types
Pull rules in Odoo 19 can be triggered in three different ways, controlling how aggressively Odoo reacts to demand:
Trigger Type | What Causes It | Typical Use |
|---|---|---|
Replenish on Order (MTO) | A confirmed Sale Order or MO | Procure per order, no buffer stock |
Make to Stock | Scheduler / reorder rule threshold | Maintain buffer stock levels |
Trigger from route | Another rule activating this one | Chained multi-step moves |
Common Pull Rule Use Cases
Fulfilling a customer delivery: pull goods from stock to the output/delivery zone
Make to Order (MTO): pull triggers a purchase order directly linked to a sale
Manufacturing supply: pull raw materials from stock to the production floor
Inter-warehouse replenishment: pull stock from a central warehouse to a satellite location
Chained procurement: pull through multiple locations until the product is sourced
💡 EXAMPLE | A Sale Order for 5 units of Product A triggers a pull rule. Odoo checks stock: 3 units available. It creates a delivery for 3 and — because MTO is active — raises a Purchase Order for the remaining 2, both linked to the same sale. |
Push & Pull Rules
A Push & Pull rule combines both triggers into a single rule. It can be activated either by the arrival of goods at the source location (like a Push rule) or by downstream demand (like a Pull rule). This makes it the most flexible rule type, and it is used in scenarios where a location must respond to both supply-side and demand-side signals.
PUSH & PULL | Trigger = Arrival at source OR downstream demand. The same rule responds to both supply signals and demand signals, making it ideal for transit and crossdocking locations. |
When to Use Push & Pull Rules
Push & Pull rules are most valuable in complex multi-warehouse or crossdocking scenarios:
Crossdocking
Goods arriving from a supplier are pushed immediately to a dispatch area without entering stock, while simultaneously satisfying a waiting customer order. The crossdock location acts as both a destination (Push from supplier) and a source (Pull from customer order).
Flow | Supplier → WH/Crossdock (Push & Pull) → Customer | Goods never touch WH/Stock. |
Transit Warehouses
A regional transit warehouse receives goods from a central hub (Push) and distributes to local branches on demand (Pull). The same transit location serves both roles, and Push & Pull rules manage the flow in both directions.
Multi-Warehouse Resupply
A satellite warehouse pulls from the main warehouse when its stock drops low. The main warehouse, in turn, pushes surplus goods to the satellite during slow periods. A Push & Pull rule on the intermediate transfer location handles both scenarios.
Push & Pull in Practice — Key Points
The rule evaluates which trigger fired and responds accordingly
Demand-driven activation behaves exactly like a standard Pull rule
Arrival-driven activation behaves exactly like a standard Push rule
Both triggers can activate simultaneously — Odoo handles the resulting transfers independently
Useful for reducing the number of separate rules needed in complex setups
Building Routes with Rules in Odoo 19
Now that you understand each rule type, here is how to put them together into a working route.
Step 1: Define or Open a Route
Go to Inventory → Configuration → Routes
Click New to create a custom route, or open an existing one to add rules
Give the route a clear name and specify which scope it applies to (product, category, warehouse, or sale/purchase order lines)
Step 2: Add Rules to the Route
Inside the route, click Add a Line under the Rules section
Set the Action (Push, Pull, or Push & Pull)
Define the Source Location and Destination Location
Choose the Operation Type (Receipt, Internal Transfer, Delivery, etc.)
Set the Auto-trigger preference if applicable
Save the rule and repeat for each step in the route
Step 3: Assign the Route to Products
Open a product and navigate to the Inventory tab
Under Routes, tick the routes that apply to this product
A product can have multiple routes — Odoo evaluates them in priority order
✅ TIP | You can also assign routes at the product category level, which applies to all products in that category automatically — saving setup time for large catalogues. |
Side-by-Side Comparison
Aspect | Push | Pull | Push & Pull |
|---|---|---|---|
Trigger | Arrival at source location | Demand from order / rule | Either arrival or demand |
Direction of Logic | Forward — pushed onward | Backward — pulled from demand | Both directions active |
Creates Transfer When | Goods arrive at source | Order / MO confirms | Either event occurs |
Stock Holding | May accumulate stock | Minimises buffer stock | Flexible — depends on rules |
Automation Level | Auto on arrival | Demand-driven | Most flexible |
Setup Complexity | Low | Medium | High |
Typical Use Case | Receiving, internal moves | MTO, fulfilment chain | Crossdocking, transit WH |
Which Rule Type Should You Use?
The answer depends on what triggers the movement you are modelling:
USE PUSH | When the movement should happen automatically on the arrival of goods — e.g., moving goods from a receiving dock to stock, or from production to a finished goods area. |
USE PULL | When the movement should only happen when there is confirmed demand — e.g., picking for a sale order, or procuring from a supplier when an order is placed. |
USE PUSH & PULL | When a location needs to respond to both supply arrivals and demand signals — e.g., crossdocking, transit warehouses, or complex multi-warehouse resupply flows. |
Summary
Routes and Rules are the engine of Odoo 19 Inventory automation. Push rules react to the physical arrival of goods and push them forward through your warehouse process. Pull rules react to demand and trace back through your supply chain to create the moves needed to fulfil an order. Push & Pull rules give you the flexibility to handle both scenarios with a single rule.
Master these three rule types and you can model virtually any warehouse flow inside Odoo — from a simple single-location operation to a complex multi-warehouse distribution network.
If you are looking for an ERP implementation partner with diverse industry experience feel free to contact us. We have proven track record of successful implementations across various sectors including Odoo for Manufacturing, Odoo for Trading, Odoo for FMCG, Odoo for Oil & Gas, Odoo for Diary, Odoo for Pharma, Odoo for Cosmetic Clinic, Odoo for Contracting Companies, Odoo for HVAC, Odoo for Logistics, Odoo for Automobile, Odoo for Laundry, Odoo for Field Service, Odoo for E-Commerce & many more
ZestyBeanz offers Developer / Consultant outsourcing programs, Chat with us in Whatsapp and Hire Odoo Developers, Mobile Application Developers, Consultants.
#OdooDevelopment #Odoo18 #CustomChatterButton #TechnicalBlog #OdooCustomization #OdooTips #Odoofeatures